Perfect Toadstool felt sewing kit tutorial
Step-by-step Instructions: If you are looking for a little extra help in making your Perfect Toadstool then you’ve come to the right place.
Let’s get started! Read through the instructions first to get a bit of an idea of what you’ll be doing, before you jump in.
Cut your paper pattern pieces out neatly with paper scissors. Place the pattern pieces on top of the felt, lining it up very close to the edges to not waste too much felt. Pin the paper pattern onto the felt to secure it in place. You can either trace the pattern onto the felt with a pencil or a thin marker and cut out using your fabric scissors, or, slowly cut directly around the edge of each pattern piece without tracing. If you have drawn on your felt, make sure that this is the inner side or wrong side of your work, so you don’t see the marks. Only ever cut through one layer of felt at a time.

Toadstool Stem: Join Toadstool stem A to one of the long sides of Toadstool stem B by sewing them together. (I tend to use a Whip stitch for all my sewing).

Gently roll the new Stem into a tube shape and stitch the piece into a long single stem.

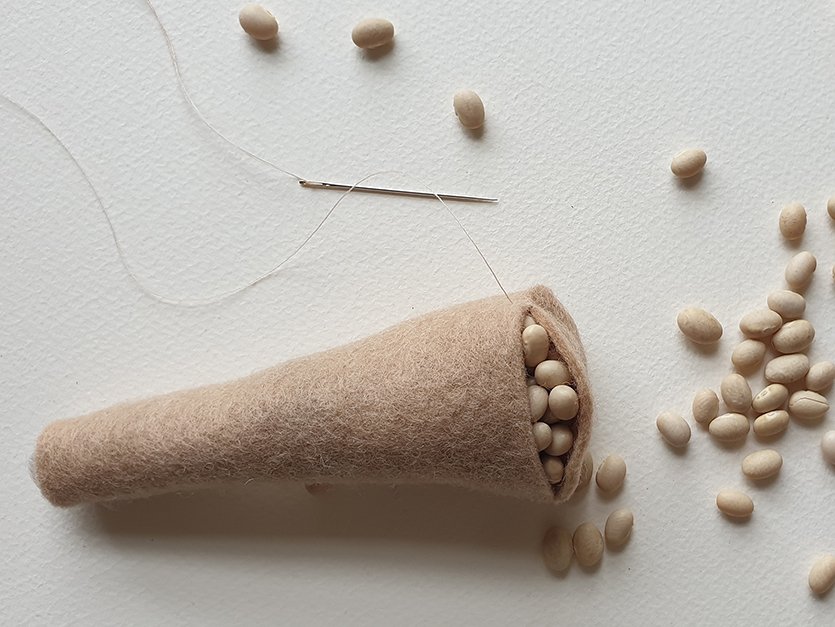
Pinch off small pieces of wool stuffing and push it into the stem from the base, up towards the top. Continue using small pieces of stuffing and fill the narrow top section first, making the stem stiff by pushing the stuffing in firmly with a pencil or your finger. Stuff down to about 3 cm before the bottom of the stem.

Sew the Stem base to the bottom of the stem, stopping 3 cm before getting all the way around and then tip the legumes/rice into the base. You can also add a 50cent coin in to helps make a more stable base for your toadstool. Once you have got the beans and coin in, you can stitch close the gap.
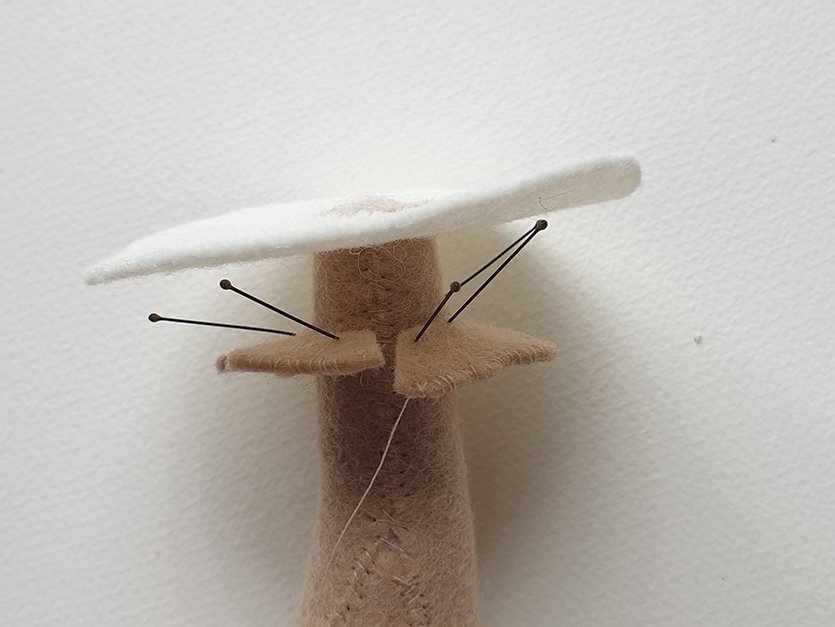
Sit the Cap underside piece on top of the Stem and sew it down onto the stem at the centre.

With the Frill you can do a running stich or blanket stitch around the outer edge if desired, then wrap the frill around the toadstool stem, about 2 cm from the top and sew the sides of the frill together and then the frill to the base. Pop a couple of pins in to keep the frill in place as you sew it on.

Toadstool Cap top: Sew the Cap B piece to the long side of Cap A. The Cap A piece will curve around to create a dome.

Then sew Cap C to the other long side of Cap A. You will now have a domed shape.

You can add French knots or other decorations to the cap now if you desire. There are lots of online tutorials on YouTube if you need help. I used two strands of off white embroidery thread and placed them in random spots around the perimeter.

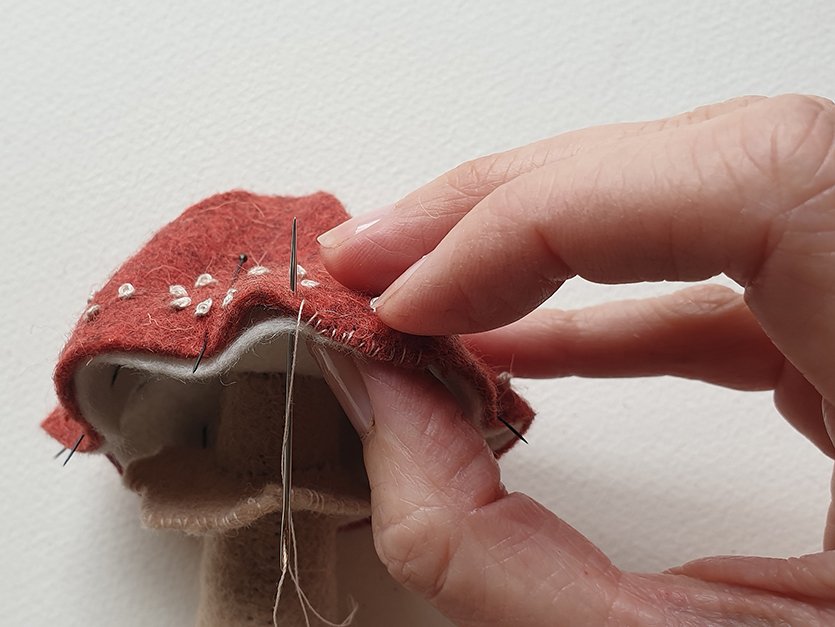
Line up and pin together the Cap Underside to the Toadstool Cap top. The cap top is a bit bigger/wider than the underside so that the outer edge wrinkles a little and looks more natural. You might need to fiddle a little to sit the underside in evenly under the cap.

Sew around the perimeter and leave a 3cm or so gap to push the wool stuffing into. Add your stuffing, choosing to either make a flatter cap or a big domed cap by adjusting the amount of stuffing you use.
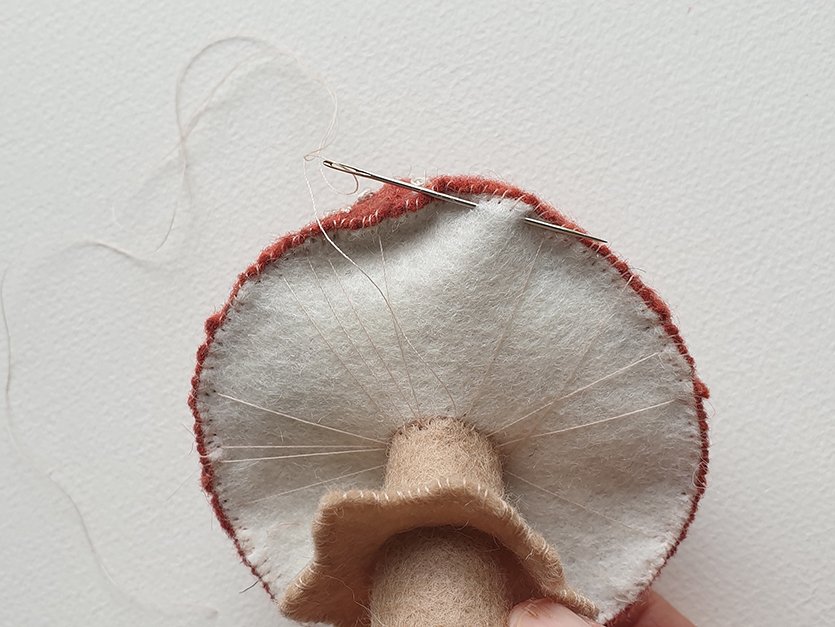
Sew some gills on the underside of your mushroom by running long threads from the stem outwards to the edges that spiral around the cap. I used an off white sewing thread.
To prevent the cap from wobbling too much, sew a few stitches through from the top of the Toadstool down into the top of the trunk. Try not to make these too noticeable.

In these photos you can see where the thread enters and exits the Toadstool cap. Tie it off near to the stem, rather than on the top.

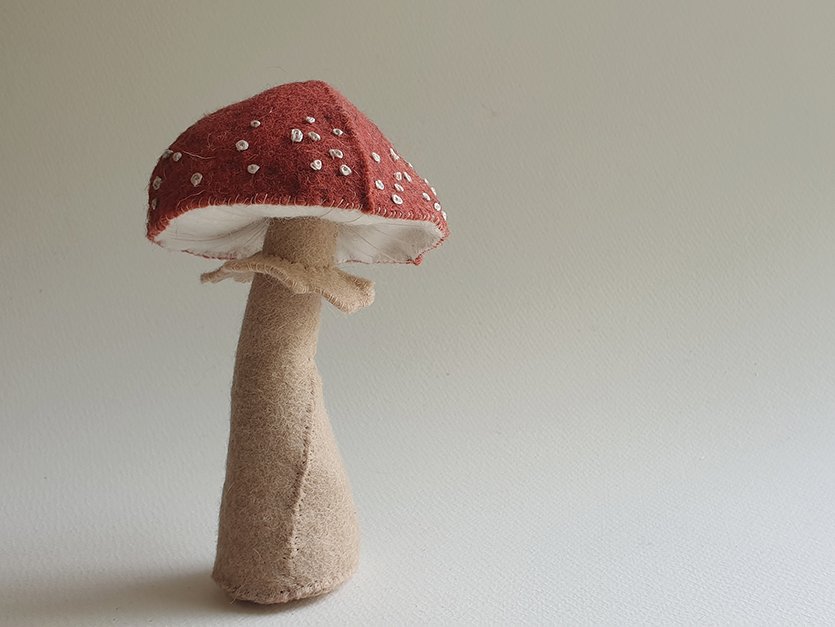
And there you have it! All finished. Now just wait for a fairy to shift in.