Forest Landscape felt sewing kit tutorial
Step by Step Instructions:
If you have the Forest Landscape Kit and would like some photos to help you make your mat, then you’ve come to the right place!
Read through the instructions first to get a bit of an idea of what you’ll be doing, before you jump in. Cut your paper pattern pieces out neatly with the paper scissors. Place the pattern pieces on top of the felt, lining it up very close to the edges to not waste too much felt. You can pin the paper pattern onto the felt to secure it in place. You can either trace the pattern onto the felt with a pencil or a thin marker and cut using your fabric scissors, or slowly cut the piece directly around each pattern piece without tracing. If you have drawn on your felt, make sure that this is the inner side or wrong side of your work, so you don’t see the marks. Only cut through one layer of felt at a time.
In this picture you can see I am halfway through cutting out the felt pieces using the paper patterns. You can see I place the pattern pieces close to the edge of the felt so I have enough for each piece and some left over to use later maybe!

Sew around the edges of the Earth Star shape. I use a whip stitch, but blanket stitch would also look great. I used one thread from a six strand Embroidery cotton. I’ve used a slightly darker brown so that the stitches are noticeable.

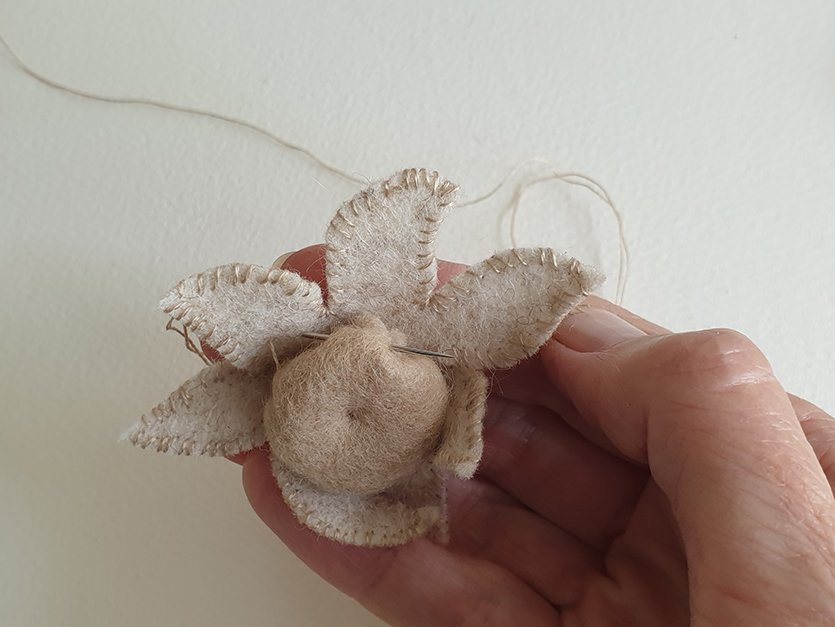
Leaving a long tail thread (with no knot at the end), sew a loose running stitch around the diameter of the Earth Star Centre piece.

Now pull both ends of the running stitch to pucker the edges up to create a small gathered, roundish ball. Tie in a double knot but don’t cut the tail threads off. We will use them soon to attach the centre ball to the star shape.

Tear off a very small amount of wool stuffing, roll it into a ball and pop it inside. Sit this side facedown onto the middle of the star shape. Using the long tail thread from the centre piece you can now rethread your needle and sew it down through the middle of the Star shape and tie it off at the back.
Now gently lift some of the ‘petals’ of the Star, catching them up by sewing through the sides of the petal and then into the side of the Centre piece, so that they curl up the sides of the ball a bit. This helps to hide the base/edges of the centre piece a bit. Secure the stitches on the bottom or underside of the Earth Star.
Now use a strong, thicker thread (like two strands of embroidery thread) to sew from the bottom of the Star, up through the middle of the Centre and go back down through both pieces, coming out close by to your thread at the top and underside. Pull the threads down firmly to tug the centre of the puffy circle down a bit and tie at the back in a double knot.
Repeat with remaining two Earth Stars. You can position them onto your green Landscape top and sew them in place now. I like to leave a gap in the centre to add either the Habitat Log and Toadstool, or other precious items later.

Now it is time to make some little tussocks/bushes. Wind one or more of the mixed yarns around a finger several times. Whilst it is still on your finger, slide your threaded needle next to your finger and under the loops of wool. You can push the needle head through first, rather than the pointy end first so you don’t prick yourself! You can now gently slide the loops of wool off, keeping pressure on the thin thread so it doesn’t slip or move.
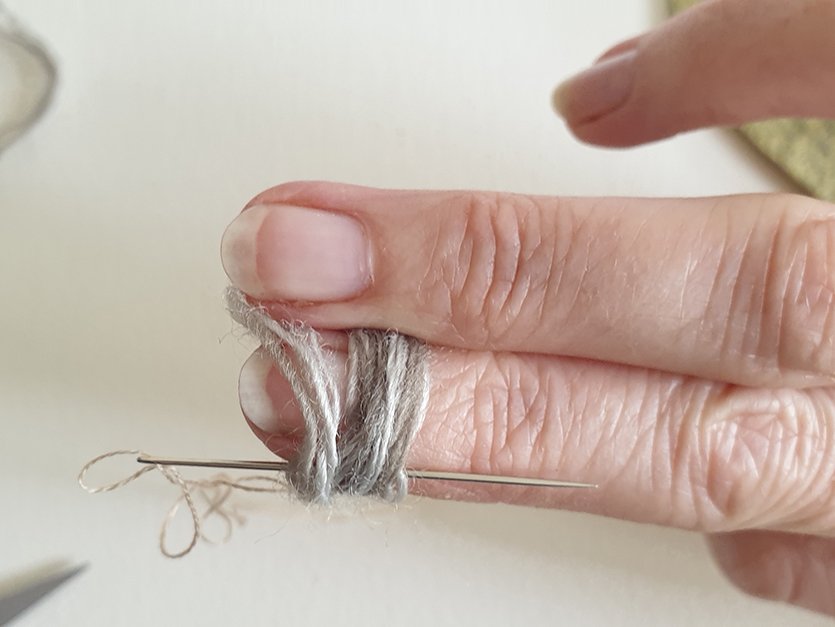
Tie the thin thread in a double knot to secure the loops. It’s a bit easier if you have your needle threaded before you do this step! Don’t cut off the tails of the thin thread. We will use these tails to tie the tussocks onto the mat.
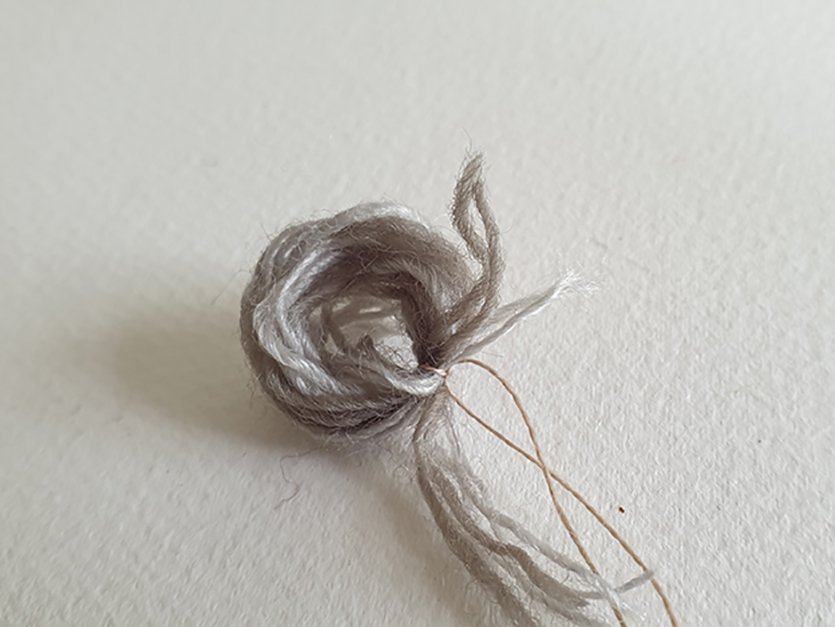
Next it is on to cutting through the loops in one spot so they are a little bunch of short cut threads. You can trim the yarn tussock into shape, making it shorter and teasing out the fibres to fluff it up. In the picture below, you can see that I hold the tussock by the thin thread to make sure I don’t cut through it.
You can make as many tussocks as you like, in a mix of yarns or in separate colours, some longer, some shorter. Pop these to the side whilst you move on to the mossy french knots.

Make some mossy patches by doing French knots in the green 4ply Finn yarn. (There are lots of online tutorials on YouTube if you need help on making French knots) You might need to switch to a needle with a larger eye to accommodate the thicker Finn yarn. I stitch them in random spots, in groups of odd numbers, clustered around the Earth Stars so they look more natural.

We’re nearly finished! This is my favourite part…. Sit the tussocks in position, playing with the placement until you are happy with your composition. Turn the mat around and look at it from different angles. Attach the tussocks by re-threading your needle with their long tail threads and stitching them through the mat, tying off on the underside.

Pin the Landscape Back piece onto the Front piece and stitch the pieces together at the edge with a whip stitch or blanket stitch.

And you’re finished! Bravo! Congratulate yourself on a beautiful job.
