Banskia felt sewing kit tutorial
Hello crafter!, Here is the online photo tutorial for making your Banksia kit. They are designed to support the written instructions that come with your kit. Start by reading the instructions through first.

Here are the contents of the entire kit on the left and on the right are the tools that you will need to have to make this project.

Flower : Part 1: We will start with the Flower first.
Step 1: The felt pieces of the flower cut out and ready to go.

You can see my rough chalk lines drawn onto the felt and stitching in a chain stitch up the felt.

Lots of short straight stitches in every direction are sewn onto the Front base piece in the mix of yellow Finn wool. These stitches also join the Top piece to the Base piece.
The Front and Back pieces are then sewn together and it is stuffed with some woolen roving.
Leaves: Part 2.
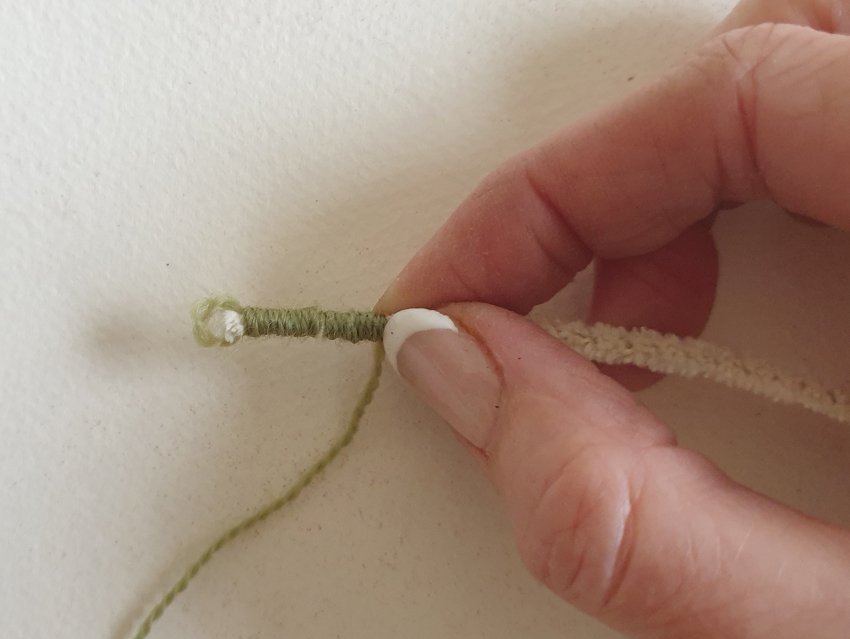
Step 3: The long pipe cleaner is covered in the green Finn embroidery wool.

Step 3: An outline or running stitch is sewn in the middle of the felt strip. The wrapped pipe cleaner is on the right.

Step 4: The covered pipe cleaner is pinned to the length of green felt. The ends of the felt are tucked over.

Step 5: The pipe cleaner is stitched onto the felt with thin cotton thread along the centre of the felt strip.
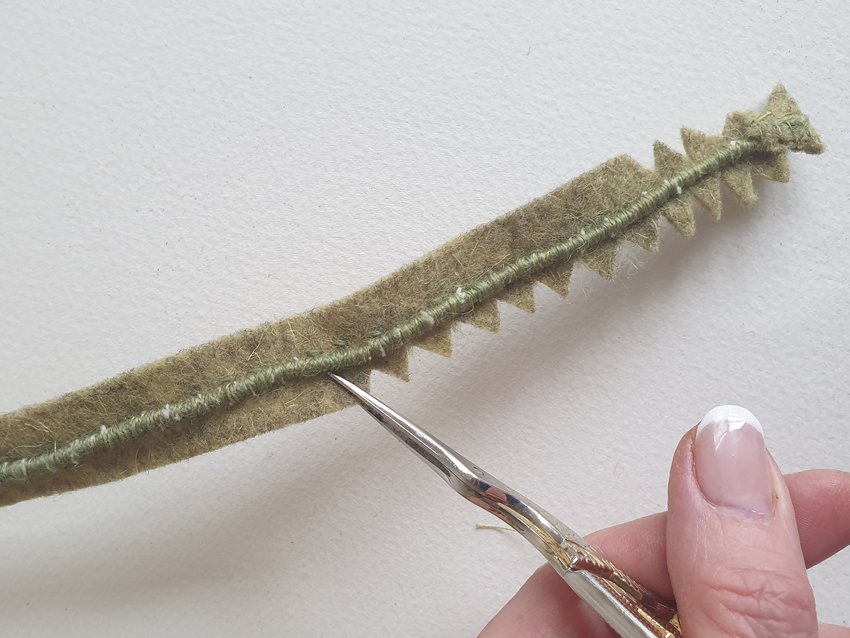
Step 6: The serrated teeth edge of the leaf is cut with sharp scissors.

Seed Pod: Part 3
Step 1: Here are the felt pieces cut out.

Step 2: The Seed sits on top of the Pod and both pieces are joined together by sewing through the middle of the two.

One Seed pod is left open whilst the others have been sewn up their sides to form little half-opened seed pods. Note the long tail of cotton is left on each seed pod to be used later.

Step 3: The Seed pods are positioned on the Front Body piece.

The Seed pods are sewn onto the front piece using the tail of the cotton thread.

Step 4: Little slits are made using sharp scissors for three of the Seed pods .

View from the other side of the Front Body piece. The seed pod is pulled partway through the slit and sewn into place at the back .

Step 6: The Front and Back pieces are pinned together. The pipe cleaner is popped in the end of the stem, between the two felt pieces.

Lastly, some woolen roving is pushed into the cavity before sewing down the stem to finish stitching the two pieces and the pipe cleaner together.

The finished Banskia flower, leaves and Seed Pod.